Node Quick Start
In this guide we will get you up and running using API Hero in a few minutes.
1. Install the API Hero js package
Install the @apihero/node package using your preferred package manager.
- npm
- pnpm
- yarn
npm i @apihero/node@latest
pnpm add @apihero/node@latest
yarn add @apihero/node@latest
2. Configure the proxy
The final step is to configure and start the proxying. You can place this code anywhere that is executed when your application starts.
import { setupProxy } from "@apihero/node";

function initProxy() {
  const proxy = setupProxy({
    // your project key can be found on your project page
    projectKey: "INSERT_YOUR_PROJECT_KEY",
    // you only need to specify the url if you want to self-host API Hero
    //it defaults to the hosted proxy:
    //url: "https://proxy.apihero.run",
    env: process.env.NODE_ENV,
    // optionally specify patterns that get proxied, it defaults to all
    //allow: ["https://api.github.com/*"],
    // optionally stop certain requests by using deny
    //deny: ["https://disallowdomain.com/*"],
  });

  proxy.start();
}

initProxy();
If you don't specify an allow list, all requests will be proxied. You can use deny to block specific requests, or use allow to opt-in to certain domains. You can use them combined to allow some request patterns and deny others.
You'll probably want to move your projectKey into an environment variable instead of committing it directly in your code.
4. Run your Node.js app to start monitoring API traffic
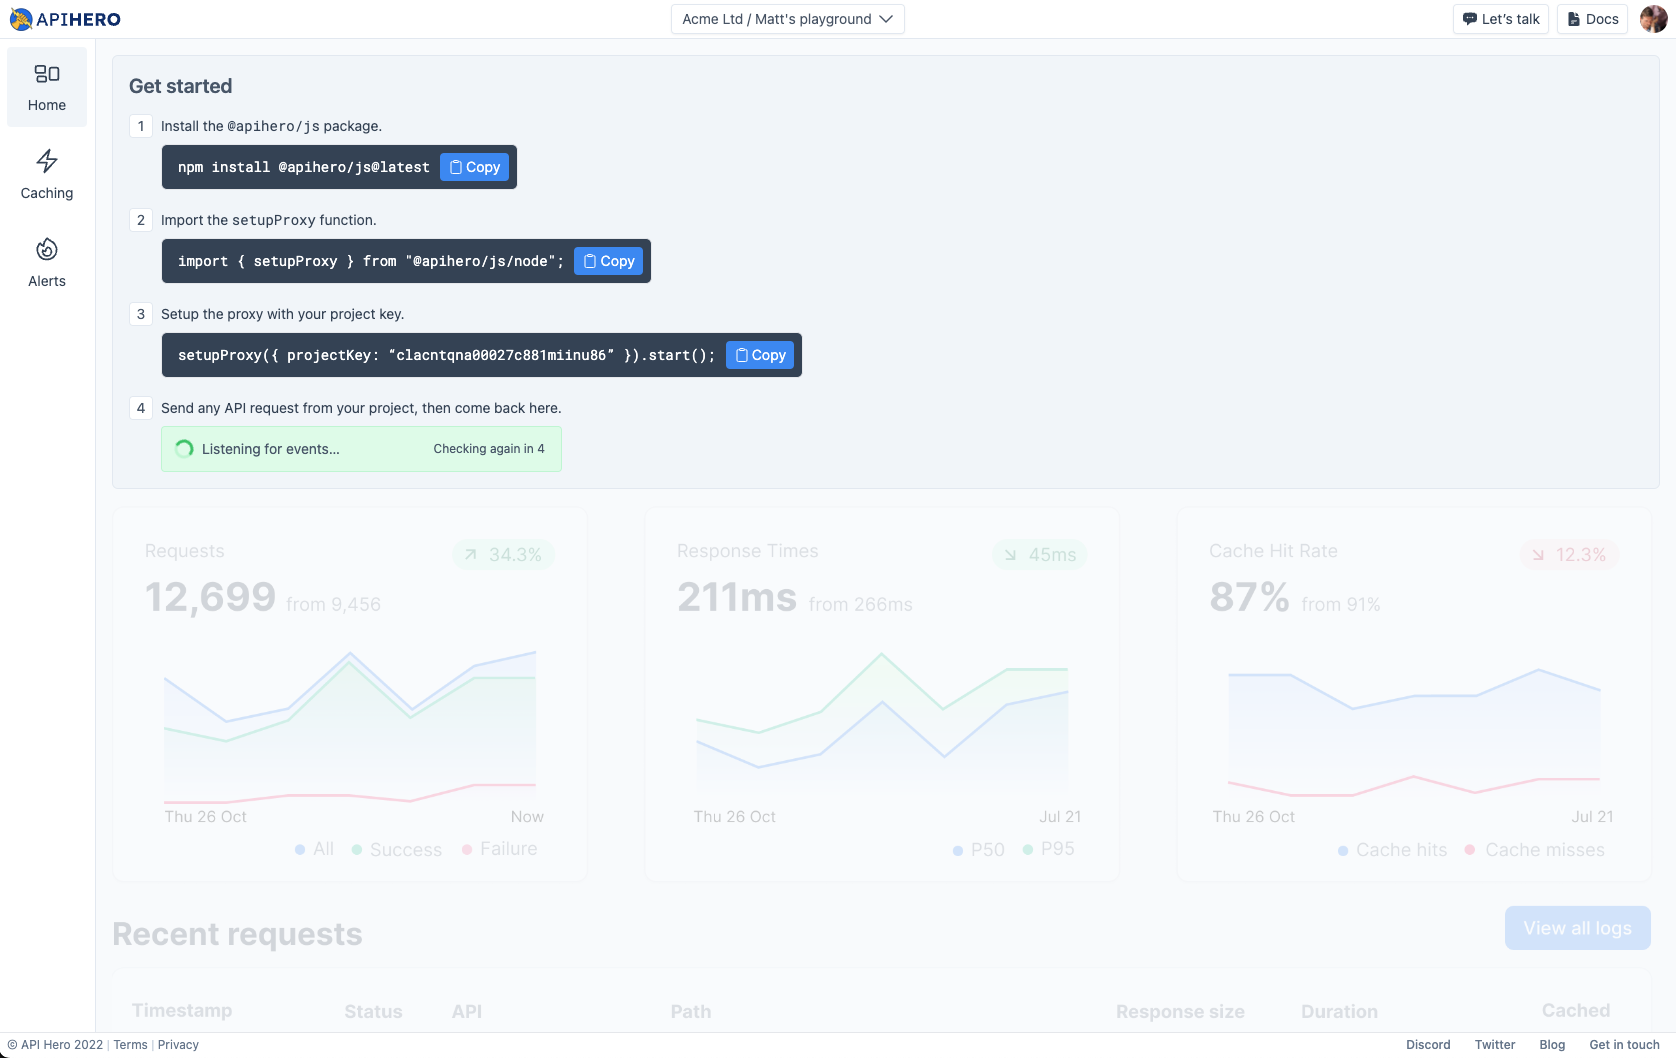
Login to your API Hero account. It should look something like this:
After you have run your Node.js app and your first logs come through the page will automatically update to the following:
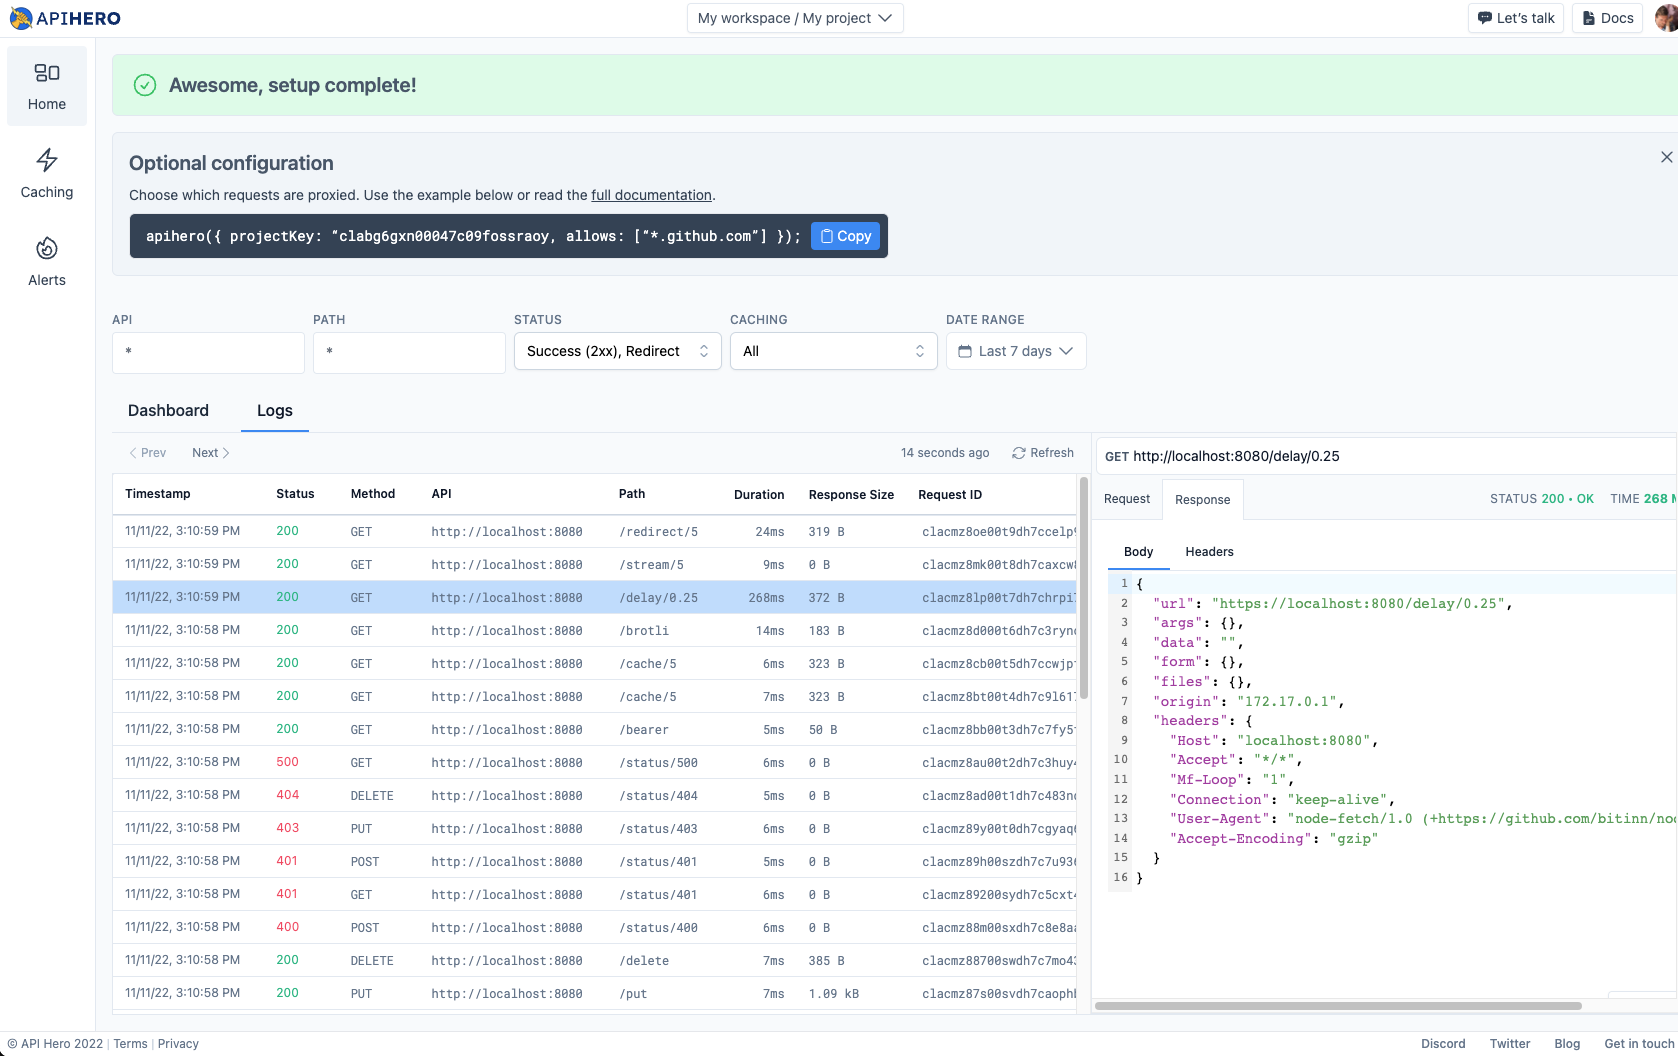
You can select any of the log entries to view the full request and response information.